Today we have an awesome project to share with you! We are joining Everyday Home in The Great Dollar Store Challenge. The 4th Thursday of each month we will share with you a different project using Dollar Store items. For this month's challenge we used glass candlesticks.


We created a Picture Frame and Message Board for The Dollar Store Challenge. This is one of our favorite crafts! It was so easy and super affordable...our kind of project.
Supplies Needed:
(3) Dollar Store Candlesticks
(1) Pack of Dollar Store Twine
Hot Glue
Paint or Stain
(2) Small Clothespins
Burlap (for bow)
Equipment Needed:
Cordless Drill
Circular Saw
Sander
Clamps
Measuring Tape
2 Screws (1 1/4in)
Wood (2 pieces 6in x 3.5in and 2 pieces 5in x 5in)
The very first step in this project is to glue two of your candlesticks together. Flip one of the candlesticks upside down on top of the other candlestick, now glue the tops together using your epoxy (super glue will work too). This gives you two different sizes of candlesticks, one small candlestick and one large candlestick. Next you will wrap the two candlesticks in twine - use your hot glue to attach it. We created a video tutorial to help explain this step better. Check it out below!
Wrapping the candlesticks with twine can take awhile so pop in your favorite movie and start wrapping! Once that is complete it's time to build the top part. The top part consists of two pieces of wood. The bottom piece of wood is 6in long by 3 1/2in wide. The top piece is 5in by 5in. If you're like us you have a scrap wood pile so just dig through there to find some wood.
Before screwing the two pieces of wood together you'll want to paint or stain the wood. After that dries it's time to screw the wood together. This is where your clamp comes in - you'll want to clamp the two pieces of wood together to make it easier for you to screw them together.
We absolutely love this craft! It cost us only a few dollars to make, most of the items we already had and the others we found at the Dollar Store. The burlap bows were created using our bowtie method, the tutorial is here.
Then you'll want to epoxy your wood piece to your twine wrapped candlestick. Be sure to read all the instructions before using epoxy- that stuff is sticky!
Now you are pretty much done. All that is left to do is to hot glue your clothespin and burlap bow to your wood.
Now you are pretty much done. All that is left to do is to hot glue your clothespin and burlap bow to your wood.
Now you have this cute message board and photo board. With Valentine's quickly approaching, this is the perfect holiday décor item. You can leave a note for your sweetie or post of cute picture of the two of y'all!
We absolutely love this craft! It cost us only a few dollars to make, most of the items we already had and the others we found at the Dollar Store. The burlap bows were created using our bowtie method, the tutorial is here.
Thanks for stopping by and joining in the Dollar Store Challenge! This Wednesday night you can link up your crafts at the Everyday Home. To check out all of the projects each month follow the group's Pinterest Board.
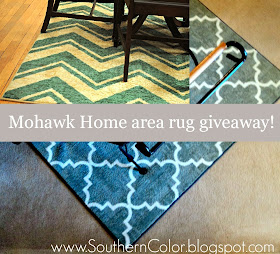
You still have time to enter our Mohawk Home area rug giveaway! Click this link to be directed to the Rafflecopter page.
Have a great week!


i love your idea. i am going to put two metal rings on the top along with plastic photo holders where you just slide the picture in then you can just flip to different pictures you want to display. the wooden piece will keep the pictures upright.
ReplyDeletececelia@bresnan.net